Showing posts with label Coach Before and After. Show all posts

Monday, September 25, 2017, Coach Woodworking Project


The Corp of Engineers' Sawnee Campground on Lake Lanier near Cumming, GA, north of Atlanta was the closest campground to Alpharetta, Georgia, the town where our son, Jon, and daughter-in-law, Sara, live.

We volunteered for a few chores at their house and while I had some familiar tools available (now in Jon and Sara's garage) I tackled a project I had been thinking about for some time. The motorhome water heater access left dead space that was begging for a little modification. Instead of a simple panel, I crafted a shallow cabinet insert. This will be a great place to stow a few miscellaneous vitamin bottles and things.


I used the water heater's "minimum to surrounding woodwork" clearance as the distance to the back of the new cabinet.


Even with lots of extra measuring, it was just a bit tight requiring some trimming for the perfect fit.
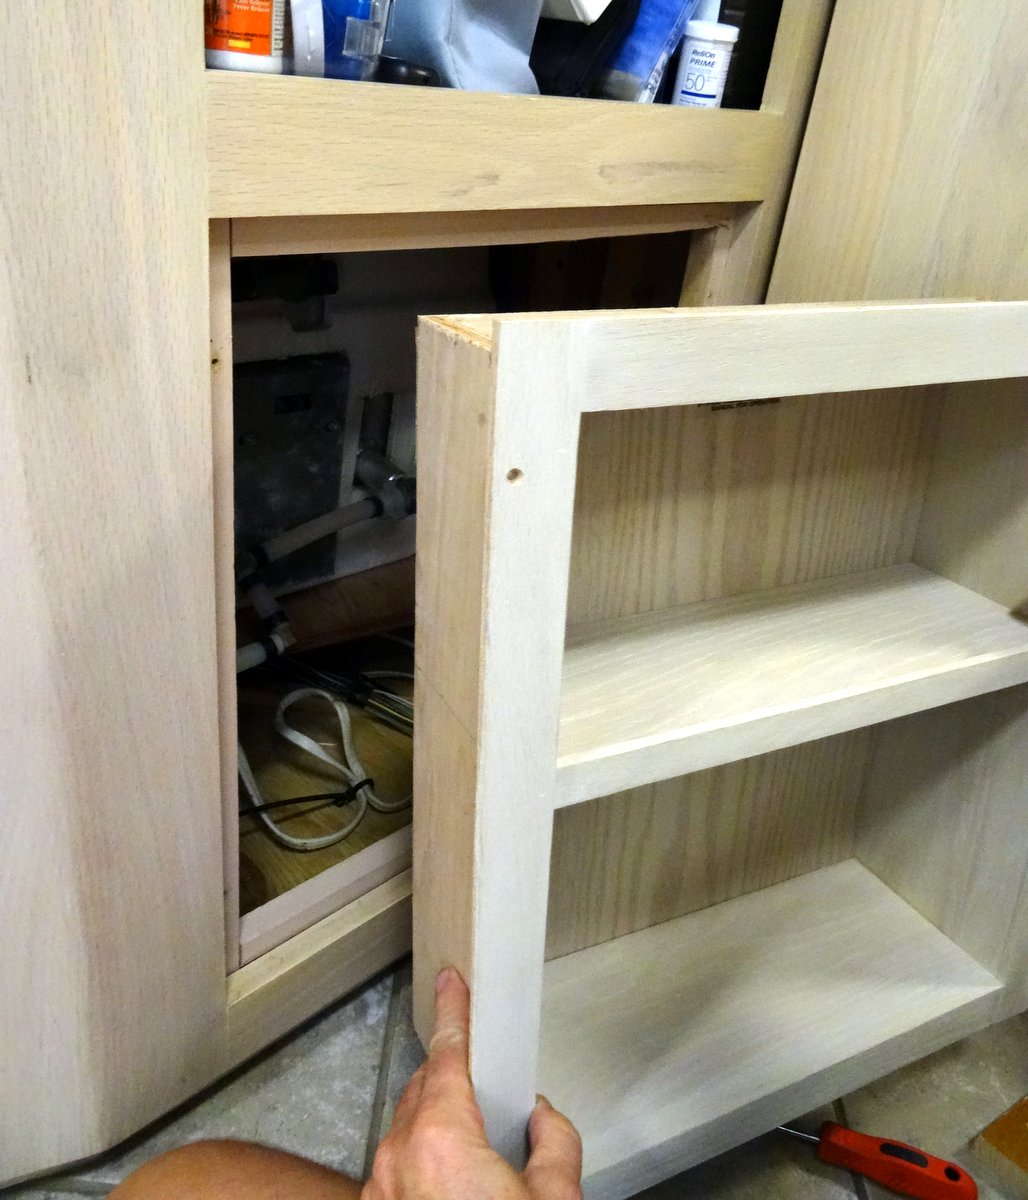


I was able to use the original panel as the cabinet back and after Joani stains the new wood to match, it will look like it was always meant to be there! As before, access to the water heater still just requires the removal of four screws - easy peezy.

Thursday, July 28, 2016


Before we left Georgia, Joani had contacted our insurance to see about the replacement of our cracked windshield.  As it happened, they could not work out anything before we headed west, but they were able to schedule its replacement in Oregon.  It took a few calls to coordinate the proper piece of glass and once we arrived at River Rim RV Park in Crooked River Ranch there was a slight delay in scheduling the work.  I had no idea how long the replacement would take or how a windshield is installed.


We were both pleasantly surprised at just how quickly the operation went.  From the time they arrived until they left was less than 15 minutes.  Beautiful, clean glass made the whole coach feel like new - I am definitely looking forward to the view on our next drive.


The Crooked River Gorge is probably less than 20 yards from the front of our coach, but to see down to the river we have to walk to the rim. The sheer cliff made me nervous, but I snapped a quick picture peeking over the edge into the abyss.  Maybe later we will hike down to the river.

Tuesday, October 27,2015


Today was the day to wrap up a project in the works for more than a year.  The J-couch had a large unused space closed in with an upholstered panel.  It was the perfect space for a basket full of Sam's toys, but the steel couch frame needed a little dressing up.


I reclaimed some 1/2 thick inch oak from the furnace vent diffuser we removed a while back.  Joani made a template which helped immeasurably since there were very few square corners.  There were several options for attaching the trim to the frame, but they each had issues.  At least I am going to claim that as my reason for taking so long to finish the job.  It was finally installed using some twist tie wires that are completely hidden.  I think that might be the last woodworking project around the coach for a while.

Saturday, October 10, 2015, Providence Canyon SP


It had been cloudy for the past couple of days, so we stayed in, taking care of a few little things.  Obviously, there was a lot of catching up on the blog. We installed a pair of wall racks for storing the laptops when not in use (which means not very often).  I made them using 1/4 inch oak and I have some reservations about how rugged they are.


Today there was still a chance for rain, but the sun was peeking through the clouds, so it was a good time for a visit to Providence Canyon State Park just 9 miles down the road.  It is a small park with just a single spur roadway, maybe two miles long, leading to the visitors center.  We were surprised by the number of visitors until we realized it was Saturday.  There were several hiking choices, but we opted for just a quick stroll along the canyon rim trail.  We could see folks hiking below in the canyon which will have to wait for another day.


While there was a lot of color in the canyon walls, it was easy to see the real beauty of this park was still a few weeks away when the leaves turn.  


We found several mushrooms that had popped up after the rain with color to rival the canyon walls.  I thought an extreme close-up was in order - Joani decided to include me for scale.  It really was pretty big. The top was the size of a large hamburger bun.


"Caesar's Mushroom* (Amanita Caesarea Greville Complex)  If you follow the link, you can see they look very different when they first pop up.

Joani found I could get my National Park Pass at the Eufaula National Wildlife Refuge nearby.  We did not expect to find the place closed just after noon on a Saturday.  Oh well, onward into Eufaula, AL where we tried some local southern home cooking at Barb's Country Kitchen. It was nicely reviewed and it had potential, but we made the mistake of sitting down 10 minutes before the buffet closed, so the food was a bit sparse and a little past its prime.

After eating, we drove down one of the main streets and found ourselves in the middle of a street fair.  Many of the town's buildings were in need of some restoration.  It was clear, however, this quaint little town was full of southern charm. 


Friday, February 13, 2015


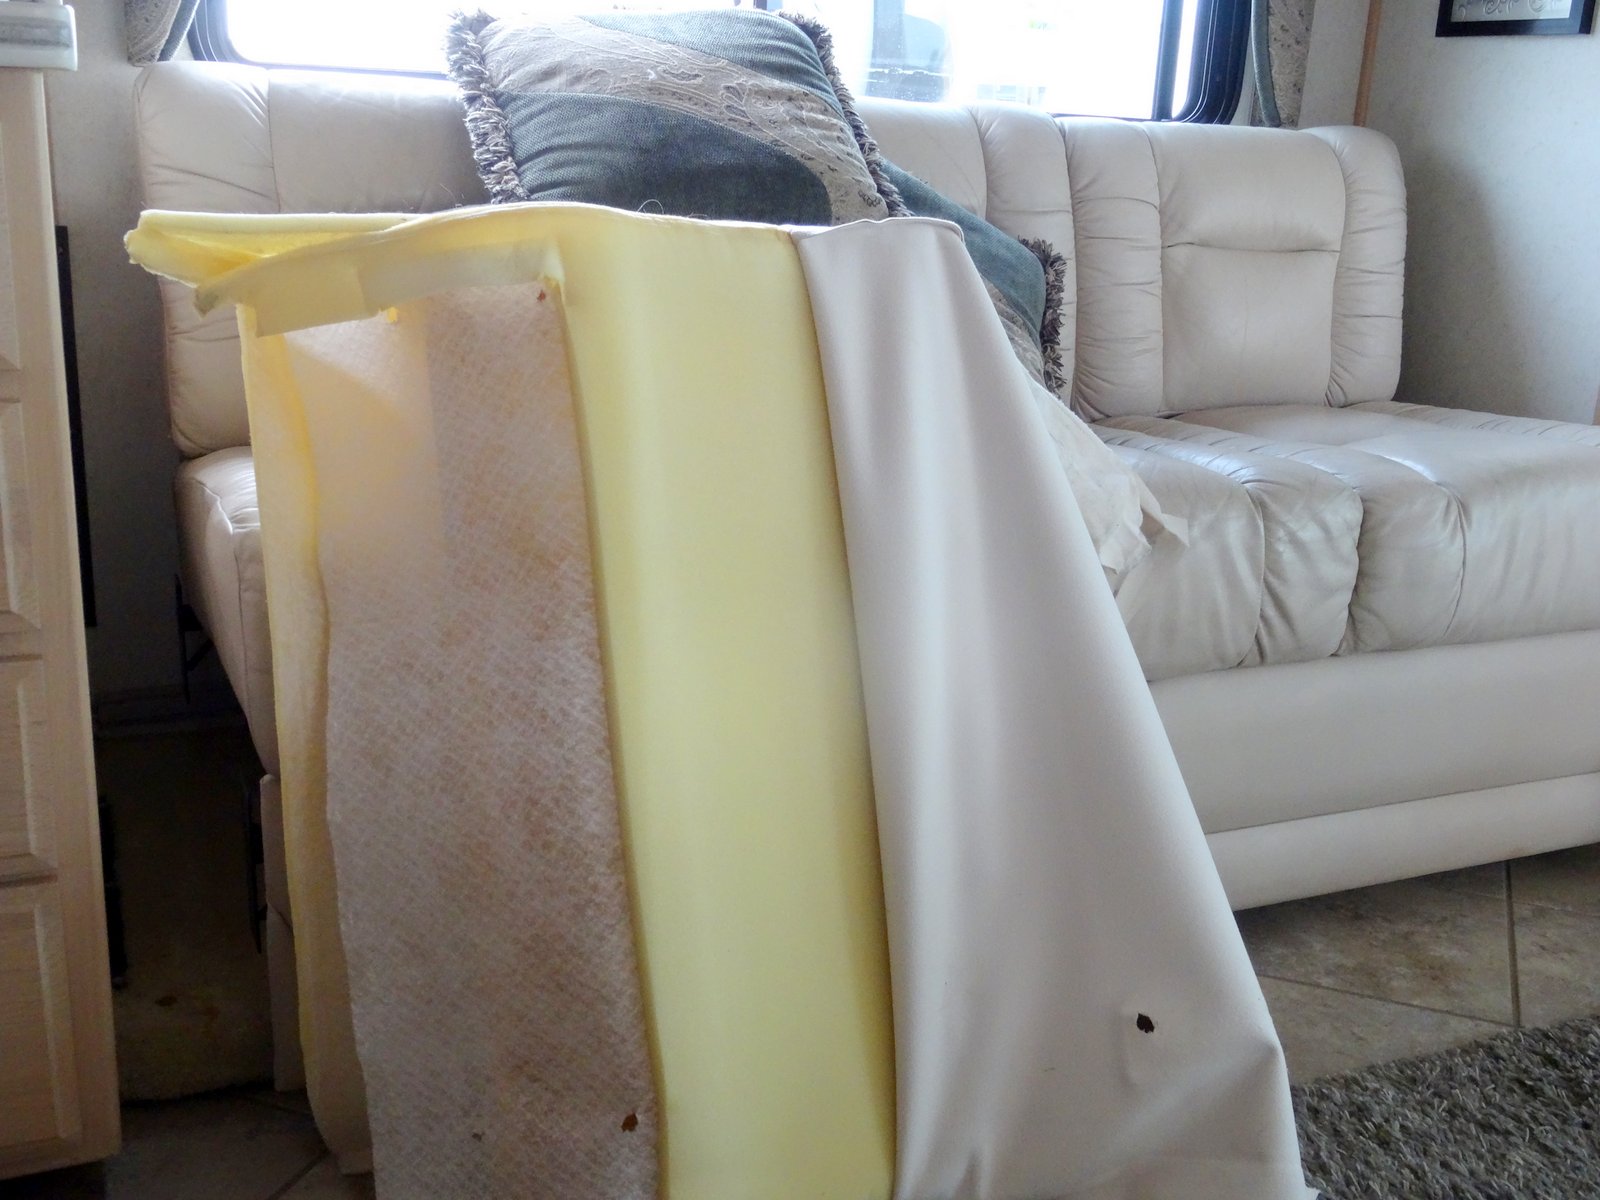
I took Sam on a long walk and returned to another project. Joani had pulled the arms off of the couch so their height could be reduced like we had previously done on the J-couch (one of our favorite improvements).

When David returned, it looked like someone had ransacked our little abode!

This is what it looks like when we are in the throes of a project.

Since we had already worked through exactly how to make the modifications, the job went pretty quickly. I managed the framework, while Joani had the tricky job of cutting the material and stapling everything back together.  Sam hates to see me pull the compressor out of the basement and really hates to hear the staple gun, so he and I took another long walk while Joani finished the job.

 By lowering the arms on the couch, we gained 9 inches (from 63" up to 72").

The arms fit so tightly, we decided to not bolt them back in place. They can now be easily removed to clean up spilled messes.

We both can now fully stretch out on the couch.

Monday, September 1, 2014


We have had the coach now for just over 6 years, so it wasn't a surprise that one of the day/night shades needed some work. Joani sent for a complete repair kit that included new string, bushings, springs and a DVD  with a step-by-step video showing how to repair the blinds. 

The string had not completely broken, but it was not going to last much longer. I could not picture how the blinds magically worked.  The DVD helped a little, but videos found online at www.fixmyblinds.com were much more helpful giving us an idea of what to expect.

It's not surprising to see this happen in a 15-year-old coach.

American Coach owners beware:  It should be noted that although they illustrated three different methods of routing the strings, none of them matched the arrangement used on our blinds (used in year-2000 American Dream). Additionally, our blinds did not use bushings and our springs were different.  

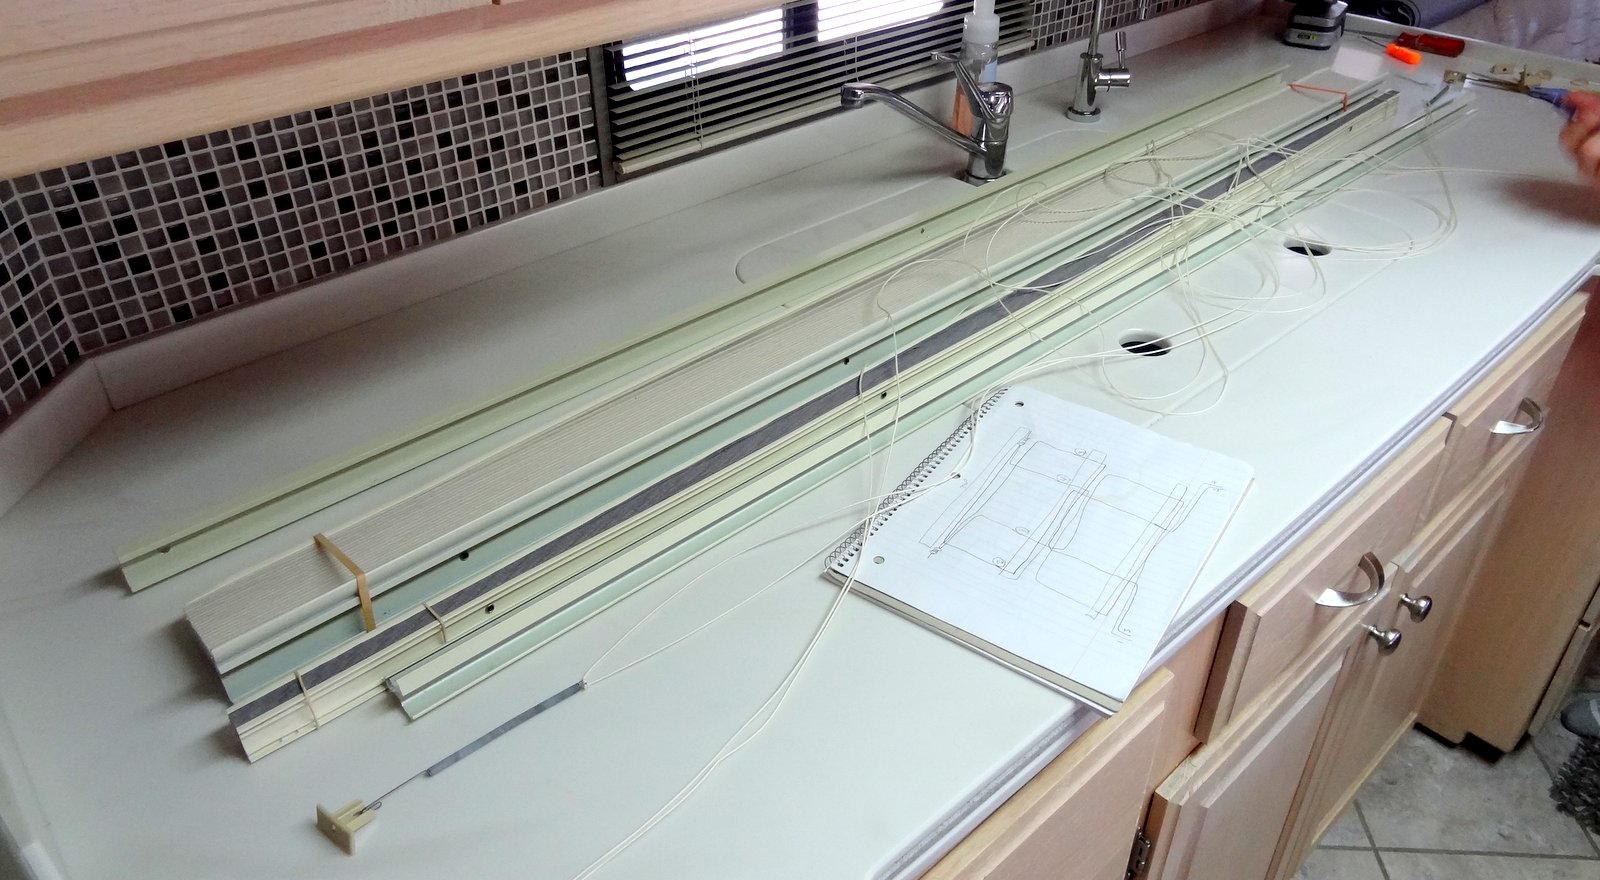
To make sure we could reassemble the shade, I marked each of the four lines and tried to carefully note where each line passed through each section and rail.  I just hoped the drawing would be clear enough when it was time for reassembly.

If David hadn't thought to do this, we would have been in a pickle.


The most difficult thing was to slide the sections apart while still following exactly where the strings went.  Rubber bands helped to keep the different sections of the blinds neat and were a must as we tried to thread the new string during reassembly.

We handled the plastic endcaps with great care.  Any plastic in our coach was well beyond its life expectancy (10-12 years).

The video said the job would take a couple of hours and I scoffed.  As it turned out, they were wrong.  It took us closer to four hours from the time we removed the unit from the wall until we were finished!


Since there are three more blinds in the coach that, at least, look the same, I decided to neaten up the stringing diagram for future use, but if we never have to perform this repair again it won't hurt my feelings.

Note:  The cord used in the RV day/night shades is not the same as shade cord that you can find at JoAnn's Fabrics.  It has an amazingly strong core which makes it quite stiff (it does not stretch).  Next time (heaven forbid, there is a next time) I will order just the cord and new cord tensioners (if needed) instead of a kit.  Our 4 strand - 62" x 30" shade required 16 yards of 1.6mm (alabaster) cording/string.  The cord was stiff enough that a restringing tool was not necessary.

Tuesday, August 19, 2014


Joani had wanted a new commode for as long as I could remember. She had done a lot of research and settled on one particular model (Dometic 320).  It was in-stock at Camping World and the guy was happy to match an internet price, so we had another project to tackle, Yea!

When we installed the floor I had capped the plumbing line with a shut-off valve, so removal of the old commode was no problem. Unfortunately, the flange collar did not line up with the new holes, so it required a few trips to Home Depot before finding just the right parts to remedy that situation.


The new unit did not include a sprayer (something Joani strongly felt was required).  I had intended to tap into the supply line but looking at the vacuum breaker module it was pretty clear they were almost identical.  Just a little modification and the module from the old unit was installed in the new unit with the required sprayer neatly included.


The last obstacle was connecting the supply line.  In a house, there are standards for most all plumbing, but Dometic did not feel the need to conform - their's was not a household product.  The valve was sized for a standard home faucet supply line (instead of a standard toilet supply line) except that there was no clearance for a standard cone washer.

After studying the mismatching plumbing for a while I decided to replace the cone washer with an "O-ring".  I was not sure just how well my fix would work, but everything tightened up well and held pressure nicely.  The last step was to replace the heavy enameled wood seat/cover (which had no place in a moving house) with a nicely molded plastic, soft close cover and the installation was complete.

Saturday, July 12, 2014


It was time to troubleshoot our blinker problem.  We determined the bug was in the Blue Ox BX88206 7 to 6 Coiled Electrical Cable.  I was dreading the prospect of forking over $100 to replace that puppy.

Joani searched the internet for anything related to the turn signal problem we had, while I checked the cable.  As I was checking continuity of the cable I found a short between two of the seven pins.  I knew that should not be right, but when I had Joani help me with it I could no longer find a short.  I opened up and inspected the seven to six pin adapter, but found nothing suspicious.

I was ready to quit for a while, when Joani found something describing how one guy disassembled the cable and found a lot of corrosion.  As she was reading, it hit me, I never tried to open the cable.  When I did I found one wire completely loose, free to short to any of the other wires and almost all of the other wires were not tight!  You have to love it when you can actually find and correct a problem - what a great feeling!

 Loosen the large set screw and the tiny screw at the end.

 Slide the metal casing back to reveal the individual wires.

Tighten each screw after making sure the wires are well seated.

NOTE:  Thanks to an Amazon review by Trimerus we will now do regular maintenance on our cord.  After researching extensively, I suspect that MANY people are replacing this cord that could have just tightened a few screws.  I guess it behooves Blue Ox to not suggest maintenance (they sell more cords), but it sure hurts their reliability ratings!  We decided not to seal the cord, as Trimerus suggests, so that we can regularly repeat this procedure and easily tighten the screws.


Later, David decided to check the cord socket on the car, and sure enough, its screws were a bit loose, too.

Monday, June 16, 2014


I decided today I would find the problem with our plumbing.  Our bathroom faucet was just slightly more than a trickle and the kitchen faucet took more than a minute to fill a gallon jug.

I wanted to find a single something common to both problems that could easily be corrected, but that didn't happen.

I started with some of the obvious things.  I inspected all of the hose fittings and additional hardware I had installed for any corrosion or mineral build up.  I bypassed the external filter and water pressure regulator.  Neither had any impact on faucet water flow.  I opened the panels in the water bay.  I checked for any unknown pressure regulator or filters.  I checked the position of the two winterizing valves.  They were in their proper positions, but I tried switching them anyway to see if they made any difference - they did not.  Next, I completely removed the check valve from the water inlet.  That also had no effect.

Inside, I opened the water heater cabinet and removed the check valve. It was clear.  Finally, I removed the bathroom faucet, resigned to do a complete and through cleaning.  I took it outside and tried to flush it out using a hose.  Mostly, that just got me soaked.  Although it seemed clear, there was very little flow through the faucet passages.  I found a screen buried in the flexible line between the valves and the nozzle.  It was pretty clogged and turned out to be our problem.


I put everything back together and verified the bathroom faucet was again working as it should.

That success made me look more closely at the kitchen faucet.  Sure enough I found another screen I had not noticed before.  It was not very clogged so it didn't make much difference.  I tried the faucet without the aerator and noted quite an improvement in flow.  I decided that I shouldn't just leave the aerator out but I noticed it could be easily modified.  I opened up a few of the holes in the aerator disc and that helped nicely.


Joani was happy with the improvements, so I thought it was a good time to declare victory and celebrate with a glass of wine.  I love that sense of accomplishment you get from a successful conclusion to a full day of hard work (I really like the retired definitions of "full day" and "hard work").

UPDATE: Wednesday I tried to improve the faucet flow further by opening up the remaining aerator disk holes.  Careful timing, however, showed no improvement leading me to believe just cleaning both screens before was all I really needed.